How to use Wondershare Dr.Fone for iOS
Here offers you a detailed instuction on how to recover lost data including messages, notes, call logs, photos, videos, Reminders, Voice memos, Voicemail, and more from your iOS devices.
Note: Make sure to set your iOS device to flight mode once you realized that you've deleted or lost important data mistakenly, and don't use your idevice for anything like syncing with iTunes, because any operation like sending/receiving messages, making/answering calls, etc. can overwrite lost data and make it unrecoverable.
Download
Get the virus-free Wondershare Dr.Fone for iOS free downloaded from the product page (Here is the download link)
Install
After downloading, please double-click the *.exe file. When a Window comes up with "Install" button, click it and get the progream installed on Windows computer. Once finished the intalling process, click "Start Now" and run Wondershare Dr.Fone for iOS.
Register
After running the free trial version, you will see a pop-up which asks you to enter licensed email and registration code.
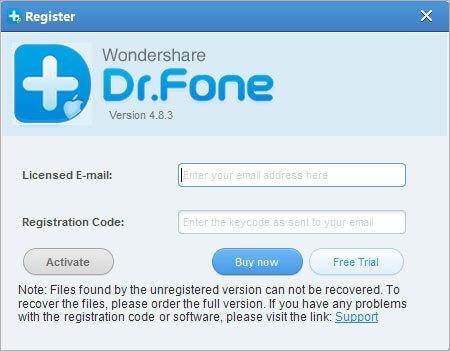
Click "Buy now" to pay for the software if you havn't finish you payment. And then copy your email and registration code, and press "Activate" to register Wondershare Dr.Fone for iOS.
Note: The trial version is only able to scan deleted or lost files from iOS device, iTunes or iCloud backup file. Preview the files which are recoverable or not.
Update
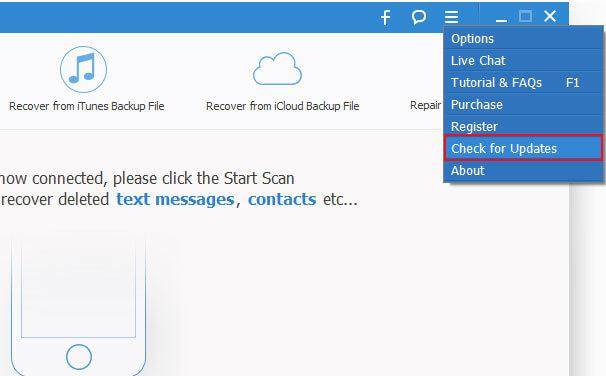
To check the updates, you can run the program and click last icon and select "Check for Updates". If an update is available, click "Update Now" to get the latest version.
Or once an update is available, run the program and from the pop-up, select to download the latest version.
Uninstall
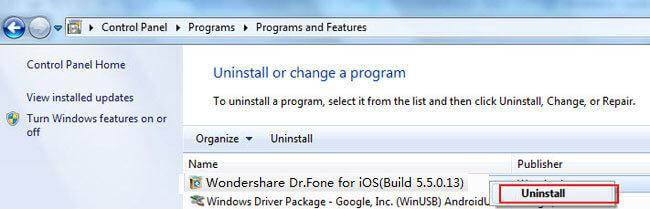
Press "Start" on computer and choose "Control Panel" > Program> Uninstall a program. Find Wondershare Dr.Fone for iOS, right-click and choose "Uninstall", and follow the instruction to uninstall Wondershare Dr.Fone for iOS from your computer.
See "Recover from iOS Device" mode supported files and devices:
| Device Model | Supported File Types |
| iPhone 4, iPhone 3GS, iPad 1, iPod touch 4 |
Camera Roll, Photo Library, Photo Stream, Contacts, Messages, Message Attachments, Calls History, Calendar, Notes, Reminders, Voice Memos, Voicemail, Safari Bookmarks, WhatsApp History, App Photos, App Videos, App Documents, WhatsApp Attachments |
| iPhone 6S/6S Plus, iPhone 6/6 Plus, iPhone 5S, iPhone 5C, iPad 2, The New iPad, iPod touch 5, iPad with Retina display, iPad mini, iPad Air, iPad mini 2, iPad mini 3, iPad Air 2 | Deleted files & Existing files: Contacts, Messages, Call History, Calendar, Notes, Reminders, Safari Bookmarks, WhatsApp History |
| Existing files: Camera Roll, Photo Stream, Message Attachments, Voice Memos, WhatsApp Attachments, Voicemail, App Photos, App Videos, App Documents, |
How To Recover Data from iOS Device
1. Connect iOS devices
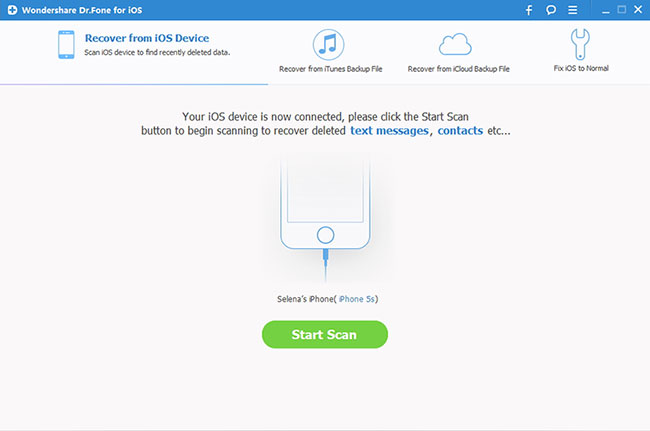
Install the program on your computer. Then connect the device to computer with its USB cable and run the software. Select the "Recover from iOS Device" mode by clicking the left panel. This mode allows you to recover lost data directly without backups.
Tips: You're supposed to download the latest version of iTunes before running the app. To avoid the automatically sync, don't launch iTunes when running the app. And I suggest you disable the automatical syncing in iTunes beforehand: launch iTunes > Preferences > Devices, check "Prevent iPods, iPhones, and iPads from syncing automatically".
2. Scan your iOS device to find deleted data
After the software detect your device, click "Start Scan" to scan your iOS devices directly.
For iPhone 4/3GS, iPad 1 and iPod touch 4, you can switch to "Advanced Mode" to get a deeper scan.
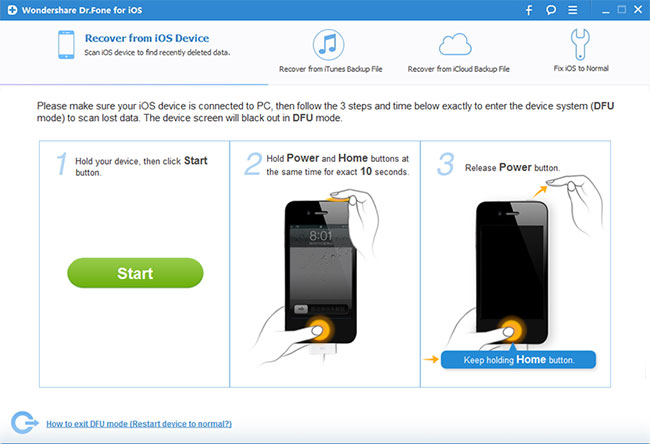
1. Hold your device and click "Start" on the window of the software.
2. Hold the "Power" and "Home" buttons on your device at the same time for exactly 10 seconds.
3. When 10 seconds have passed, release the "Power" button right away, but keep holding the "Home" button for another 15 seconds.
After you enter DFU mode successfully, the iPhone data recovery software will scan your device automatically.
3. Preview and recover your deleted iDevice data
When the scan is finished, you can click the left panel and preview all deleted and existing data, they will display different colors, you can click Only display the deleted items to separate them. You can search for a specific file by typing a keyword in the search box. Then mark the files you want to recover on right panel and then hit the Recover button to save them on your computer, for some text contents like messages, notes, contacts, the software will give your the tips to "Recover to Computer" or "Recover to Device", you can choose one depending on your needs.
See "Recover from iTunes Backup" mode supported files and devices:
| Device Model | Supported File Types |
| iPhone 4, iPhone 3GS, iPad 1, iPod touch 4, iPhone 6S/6S Plus, iPhone 6/6 Plus, iPhone 5S, iPhone 5C, iPad 2, The New iPad, iPod touch 5, iPad with Retina display, iPad mini, iPad Air, iPad mini 2, iPad mini 3, iPad Air 2 |
Camera Roll, Photo Stream, Contacts, Messages, Message Attachments, Calls History, Calendar, Notes, Reminders, Voice Memos, Voicemail, Safari Bookmarks, WhatsApp History, App Photos, App Videos, App Documents, WhatsApp Attachments |
How To Recover Data from iTunes Backup
If you made backups in iTunes, then you can choose another mode Recover from iTunes Backup File.
1. Choose Recovery Mode
After running the restoring program, click "Recover from iTunes Backup File" on the top of the main window, and then you'll see the window below.
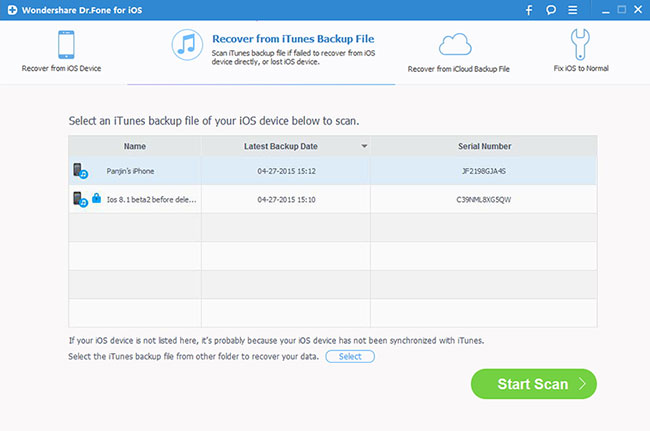
2. Scan Data from iTunes Backup File
All iTunes backup files on your computer will be immediately found and displayed on the window. Choose the one for your device and click Start Scan to extract the content out of it.
Note: If there are more than one iTunes backup files for your device, choose the one with the latest date. You can also extract all the iTunes backup files one by one when you have a need.
3. Preview and Recover data from iTunes backup
When the scan is completed, you can preview all the contents in detail by clicking the categories one after one. Mark those you want and click the "Recover" button. Now contacts, notes and messages can be directly recovered to your iOS device if you keep your iOS device connected with computer via a USB cable during the recovery process.
See "Recover from iCloud Backup" mode supported files and devices:
| Device Model | Supported File Types |
| iPhone 4, iPhone 3GS, iPad 1, iPod touch 4, iPhone 6S/6S Plus, iPhone 6/6 Plus, iPhone 5S, iPhone 5C, iPad 2, The New iPad, iPod touch 5, iPad with Retina display, iPad mini, iPad Air, iPad mini 2, iPad mini 3, iPad Air 2 |
Camera Roll, Contacts, Messages, Message Attachments, Calls History, Calendar, Notes, Reminders, Voice Memos, Voicemail, Safari Bookmarks, WhatsApp History, App Photos, App Videos, App Documents, WhatsApp Attachments |
How To Recover Data from iCloud Backup
First, ensure that you have already backed up all the data in your iPhone to iCloud first.
1. Choose Recovery Mode
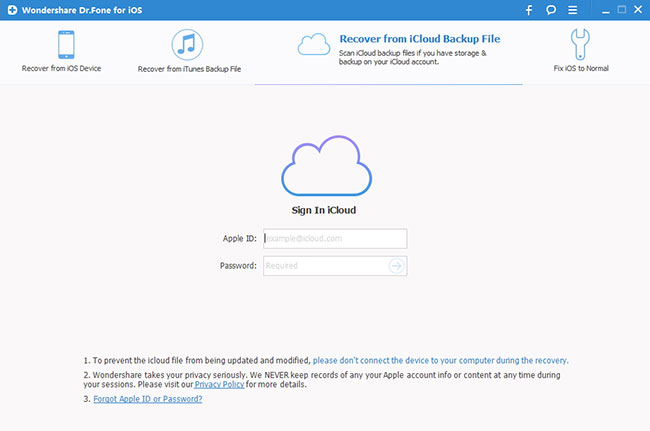
Install and run the program, tap the icon "Recover from iCloud Backup Files".
2. Download iCloud Backup File
Login in your iCloud account, select the backed up data you want to recover, and click on the "Download" button.
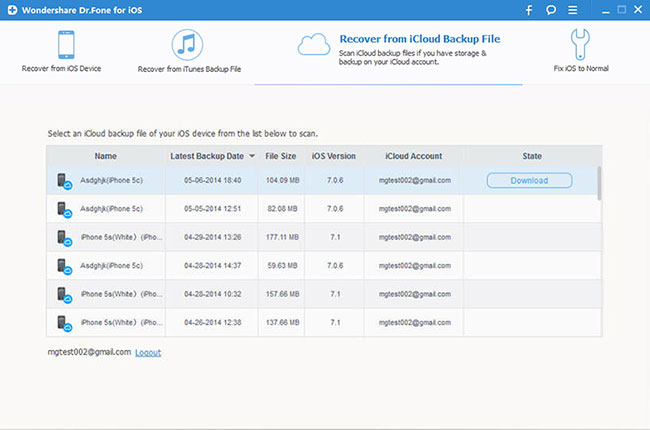
When the download is complete, download button will become the scan button, click it to extract iCloud backup.
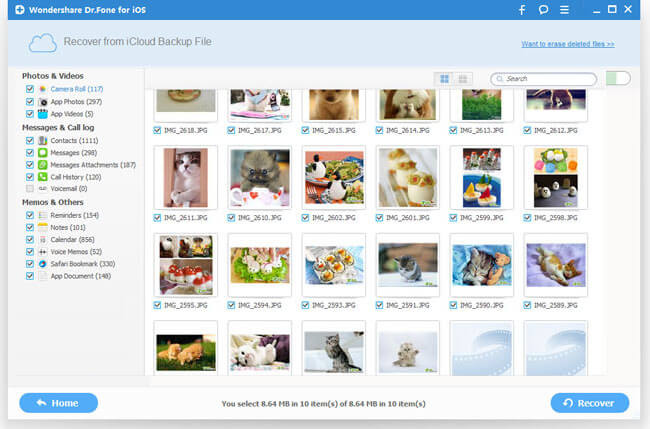
3. Preview and Recover Data from iCloud Backup File
The scanning will not spend too much of your time, once it finish, you can see all the extracted content from the selected iCloud backup, just tap to preview them one by one, choose whatever you want and click "Recover to Device" or "Recover to Computer" to get them back.
How To Fix iOS to Normal
With "Fix iOS to Normal" feature, Wondershare Dr.Fone for iOS enable iOS users to one click repair operating system, making it easy for users to get iPhone, iPad and iPod touch of Recovery Mode, Apple logo, and fix the issues when your iOS device perform abnormally. What's more, the repair program will not cause any data loss during the repairing process.
Note: After using this function, your iOS device will be updated to the latest iOS version. And if your iOS device is a jailbroken one, then it will be updated to non-jailbroken. If you have unlocked your iOS device before, then it will be re-locked again.
1. Choose the Repair Operating System feature
Run iPhone Data Recovery and switch to "Fix iOS to Normal". Then Connect your iPhone/iPad/iPod to computer with its USB cable. After that click "Start" to continue the process.

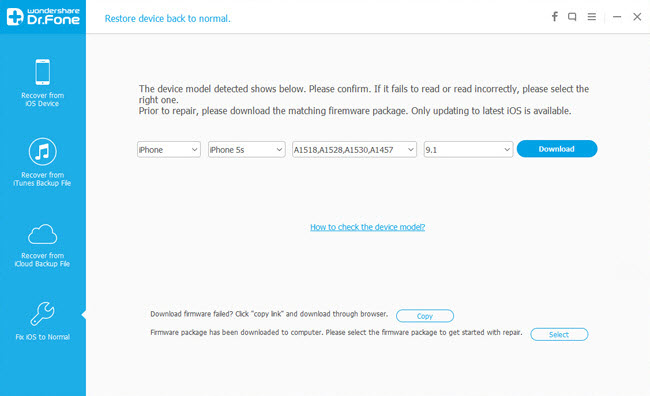
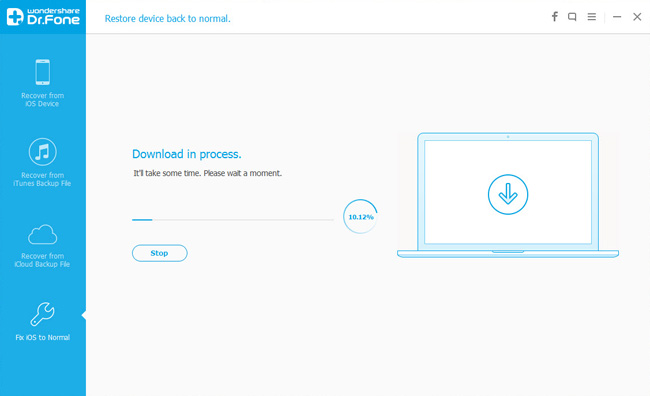
2. Download and select firmware
You need to download the firmware for your iOS device before you want to fix the abnormal operating system. This iOS Data Recovery will recognize your iOS device, offering the latest iOS version for you to download. After downloading the firmware for your device, click Next to continue. In the next window, click the "Browse" button to locate the firmware you've downloaded to your computer.
3. Fix the abnormal operating system
Once you have completed the above steps, then you need to Click "Start Fix" at the bottom to let the program to get your iOS device out of recovery mode and Apple logo looping, or get your iOS device to work properly. In a few seconds, it will tell you that your device is restarting to normal mode.
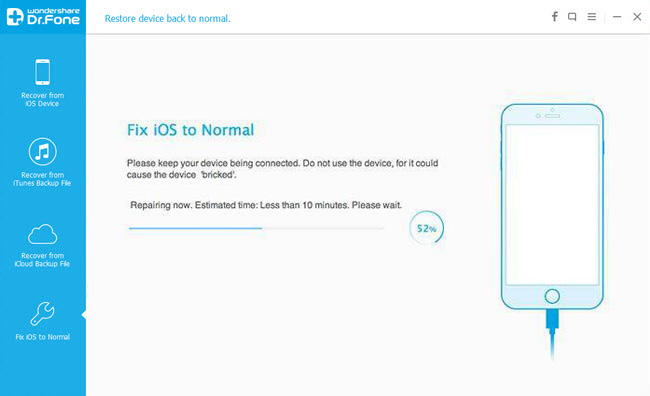
The whole process of repairing your iOS device operating system takes you less than 10 minutes.

The professional Wondershare Dr.Fone for iOS is developed to recover all your lost contacts, messages, photos, notes, etc. from iPhone, iPad and iPod touch.
Price: $69.95 $55.96