How to use iFastime Video Converter Ultimate
Import files
3 different ways can be used to import files to the software
1. Click “File” drop-down menu, and select “Add Video/Audio” or “Add from folder” to load source files.
2. Click “Load files” icon or “Add video” icon on the top toolbar to import source files.
3. Drag and drop the video, audio files directly from its source folder to the program.
Tips:
1. If you are importing Tivo files to the sofware, make sure enter your Media Access Key, then hit the “OK” button to confirm.

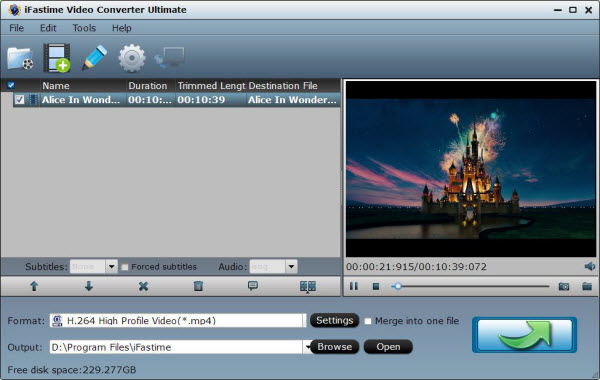
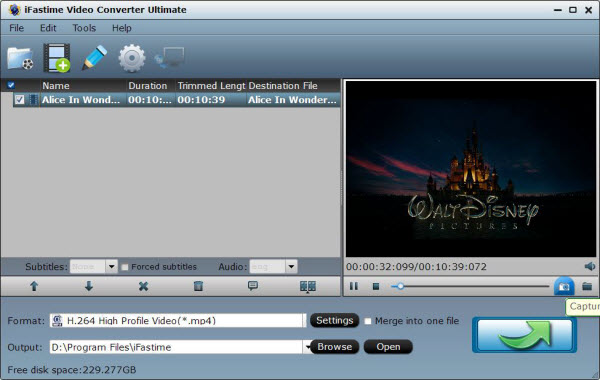
2. All the imported files will be listed in the left pane, check one of them and click the “Play” button to view them in the right preview window. Click the “Camera” icon under the preview window to take a snapshot from the playing video and save them as thumbnail for further usage. You can view the taking snapshots by hitting the folder icon.
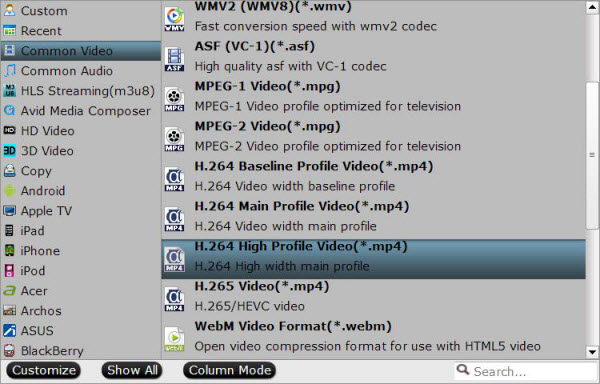
Choose output format
From the “Format” drop-down list, you can select your desired output format or hit the left bottom “Customize” button to define which formats to be shown on the list.
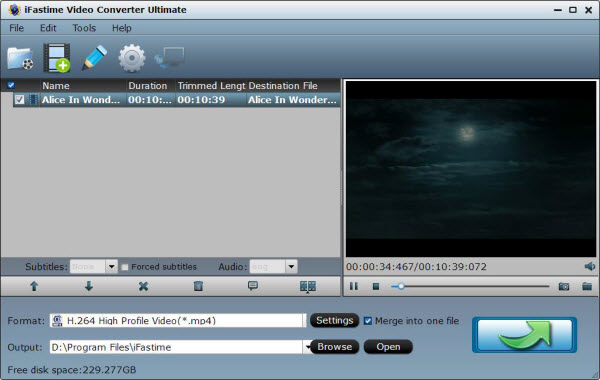
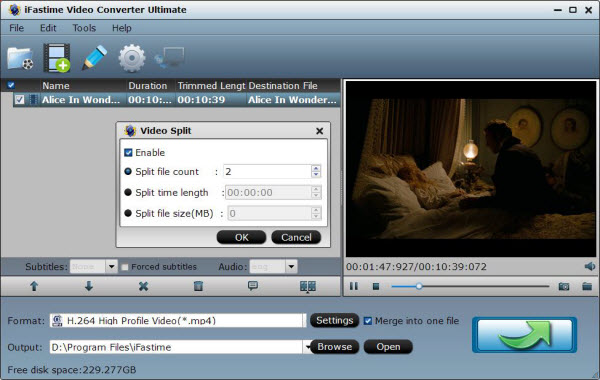
Merge and split files:
By checking “Merge into one file” option on the main interface, you can combine selected files into one single file.
Click the “Split selected task” button under the file list or from “Edit selected task” drop-down menu, you can pop out the “Video Split” window. Check “Enable”, then you will be able to split file by count, length or file size.
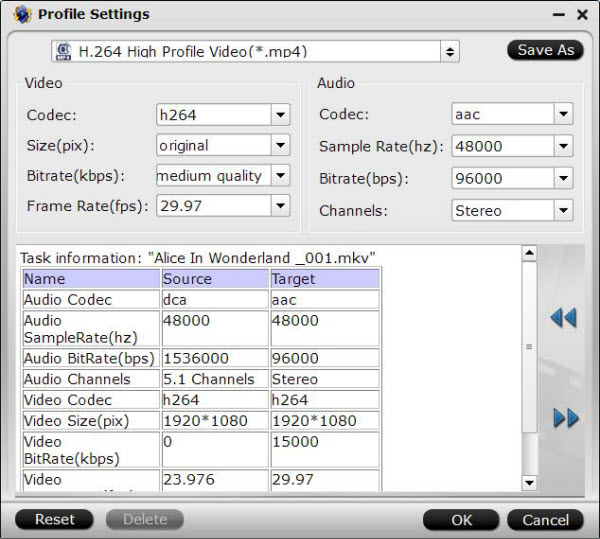
Customize output profile parameters
All formats are output with optimized profile parameters. You can still customize according to your own needs or preference. Hit the “Setting” button on the main menu to open the “Profile Settings” window, here you can adjust video/audio codec, size, bit rate, frame rate, sample rate, channels, etc. And you can compare the detailed information of the source video and the target video in the Task Information section.
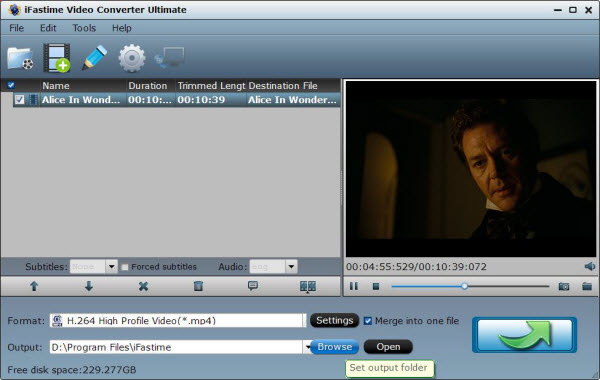
Choose output Directory and folder
Click the “Browse” button on the main interface and specify a directory on your computer hard drive to store the converted files. By click the “Open” button, you can view your converted files in the output folder.
Begin Conversion
Click the “Start conversion” button in the right-bottom of main interface to start the conversion process.
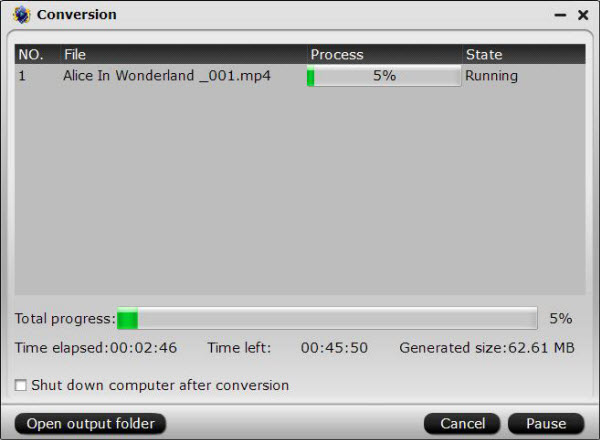
The conversion information such as Time elapsed, Time left, Generated size, and Estimated size will be listed on the window. You do not have to wait around for the conversion to complete, you can do your own work by checking “Shut down computer after conversion” option on the window to leave the program running. When the conversion is over, Click the “open output folder” to locate the converted files from the popup output directory.
Note: If you are using the trial version, there will be a watermark of iFastime logo on the middle of the output files. To remove the watermark, please click “Help > Register > Order to get the full version.
iFastime Video Converter Ultimate provides users beneficial and simple to use editing functions. The “Edit selected task” icon on the top menu is grayed out by default, you can active it by selecting an item first. After selecting a video, click the “Edit selected task” icon on the main interface top toolbar, you will open the video editing window, you can play and preview the original video and output effects, you can also flip, rotate or reset the video.
Basic editing tabs
Play/Pause: Click to start playing the current video or pause the playing.
Stop: Click to halt the playback.
Previous Frame: Click to go back to the former frame.
Next Frame: Click and go to the next frame.
Left square bracket: Click the set the start time for trimming.
Right square bracket: Click to set the end time for trimming.
Flip Horizontal: Click to horizontally flip the video.
Flip Vertically: Click to vertically flip the video.
Rotate counter-clockwise: Click to rotate the video 90° towards left.
Rotate clockwise: Click to rotate the video 90° towards right.
Reset: Click to restore the default value.
7 mainly editing functions
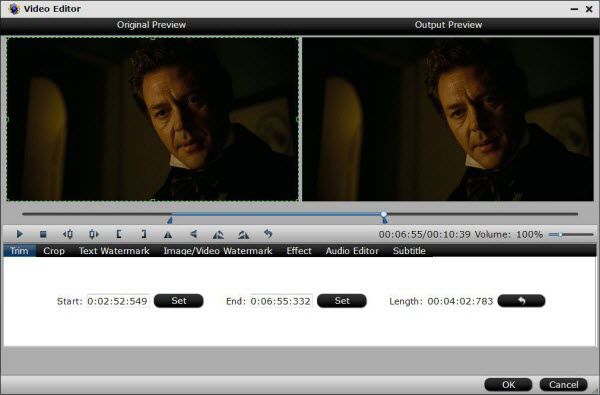
Trim:
You can use the “Trim” function to remove the unwanted segments by deciding where to start and where to end when converting the selected clip. Videos can be trimmed in the following methods:
1. Directly drag the control sliders to include the segment you want to leave.
2. Click the left square bracket to set the start point and hit the right square bracket to set the end point when previewing the video.
3. Fill in the specific value in the “Start Set” and “End Set” box.
Trim frame by frame: By clicking “Previous Frame” and “Next Frame” options, you can accurately trim video by frames.
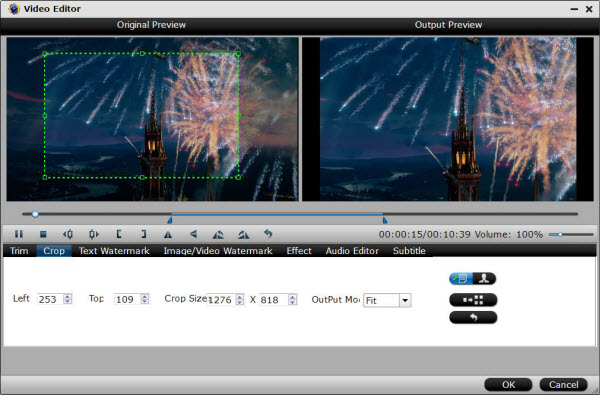
Crop:
With the “Crop” function, you can remove the black edges around the image. Switch to “Crop” tab and use the methods below to crop video:
1. Crop video simply by moving your mouse cursor to drag and adjust the green dotted line around the image to desired position.
2. Crop video by setting specific values. There are “Simple Mode” and “Advanced Mode” under Crop feature.
Simple Mode: You can set cropping values in the box of “Left” and “Crop Size” to select your crop area.
Advanced Mode: there are four value fields: Left, Top, Width and Height. You can either type in specific values in the fields or adjust sliders to crop the source file.
Keep original aspect ratio and cropped aspect ratio
To keep original aspect ratio, make sure the “Display aspect ratio” and the “Size(pix)” in “Settings” option are all set as “Original”. If you want to keep the cropped aspect ratio, you can choose from several aspect ratios including 16:10, 16:9, 5:4, 4:3, 3:2, 2:1 offered by the program.
After you select a “Display aspect ratio”, the “green crop frame” will keep this output aspect ratio and you can preview the final effect in the “output preview” window, do not forget to set the video “Size(pix)” section in “Profile Settings” window as the same ratio as display aspect ratio.
For example, if you want to output a file with “3:2” aspect ratio, firstly, select “3:2” from “Display aspect ratio” option list, then go to “Settings” section to adjust the Video “Size(pix)” as 720x480 or 1440x960.
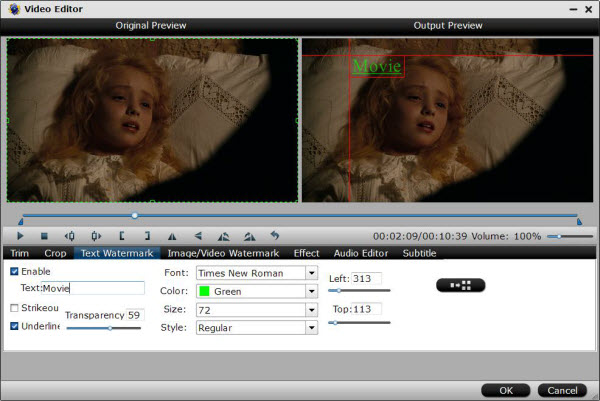
Add Text/Image/Video Watermark:
Text Watermark
Check “Enable”, you can add your desired text watermark to the selected video, you can also drag the text watermark on the preview screen to adjust its position, or set text font, color, size and style.
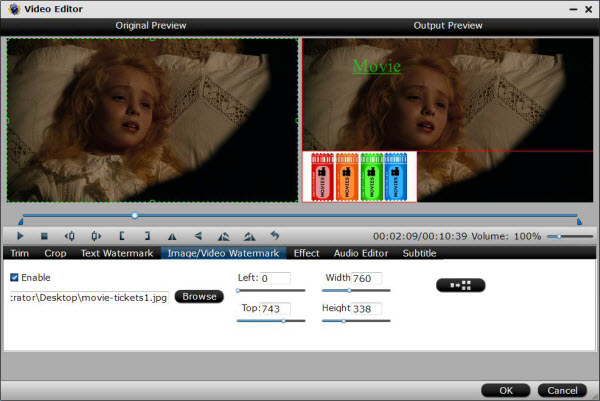
Image/Video Watermark
Tick off “Enable”, you can apply image or video watermark to the selected video. The location for the image/video watermark can also be set by dragging on the preview screen.
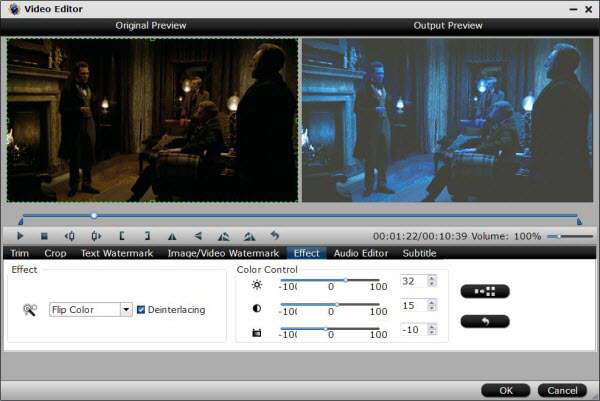
Effect:
From effect drop-down option, you can select special effects like: Simple Gauss Blur, Flip Color, Invert, Aged Film to apply to your source video. In Color Control section, you can change color by adjusting brightness, contrast, saturation. You can also check “Deinterlacing” to keep good image quality.
Apply special effect:
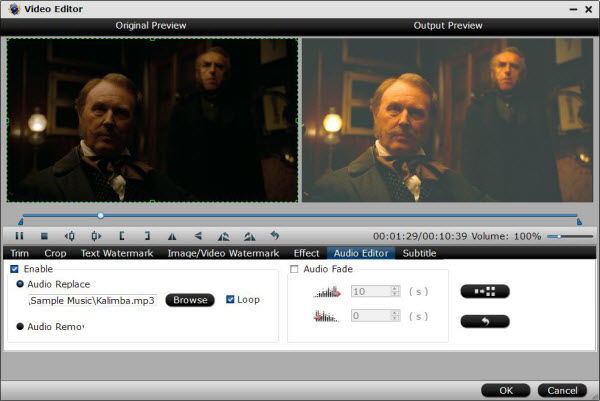
Audio Editor: You can remove the original audio from video or replace the original video with another audio, you can also set audio fade in or fade out effects.
Edit audio:
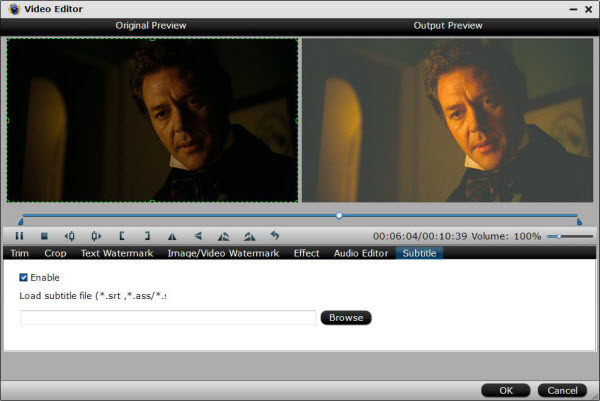
Subtitle:
Check “Enable”, you can add *.srt or *.ass/*.ssa subtitle files to the video as hard subtitles.
Add subtitles:

Ultimate media solution to convert all SD, HD, 2K, 4K videos to play, edit, share on Windows 10.
Price: $45.95