How to Add or Put Movies to iPad from PC/Mac Easily
Jan 22, 2016 06:35 pm / Posted by Charles Brown
With the gorgeous screen, high-resolution display, sharp color and robust battery life, iPad is making itself a incredibly solid device to play movies, television shows and other videos in high quality. Many of us like to put movies from computer on iPad to enjoy them while traveling. Here I will introduce 6 simple methods to place movies, TV shows and videos into the iPad (iPad Pro Supported) on Windows or Mac.

Part One. Transfer Supported Movies to iPad on Windows/Mac
Firstly you need to make sure the movie format is compatible to iPad. If not, do not hesitate to convert movies to iPad for playing with an awesome video converter like iFastime Video Converter Ultimate.
Whenever transferring movies to iPad is mentioned, the first tool we could think of is iTunes.
How to Transfer movies to iPad through iTunes
Step 1. Launch iTunes on your PC or Mac.
If you do not have iTunes installed on your PC or Mac, you may download it for free from Apple's Official Website.
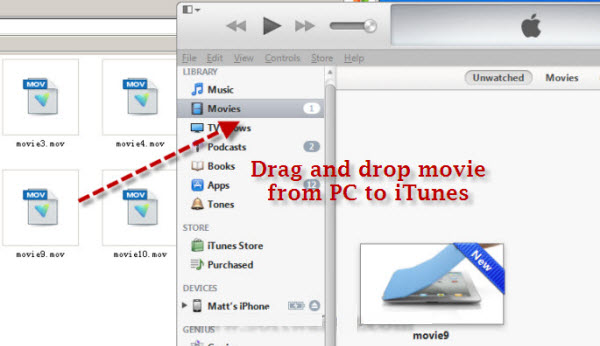
Step 2. Import videos from computer to iTunes
You can simply drag and drop your movies from computer to iTunes library. Then the added videos will be listed under the Movies library in iTunes.
Step 3. Connect your iPad with computer.
Connect iPad to computer using the USB data cord. iTunes will then automatically detect iPad connection. Select iPad in DEVICES section of iTunes device list. You will see a number of tabs across the top, including "Music", "Movies", "TV Shows" and other tabs.
Step 4. Transfer movies from computer to iPad
Click the Movies tab, then check the box before to "Sync Movies", you can select individual movies from your library. Check the box besides to the name of the movie you want to sync to iPad.
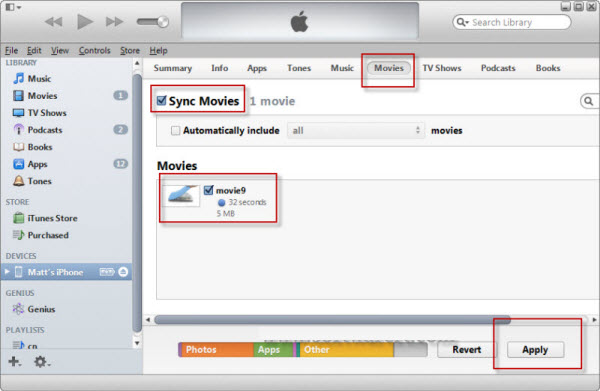
If you check the "Automatically add" checkbox under the "Sync Movies" box, you can choose to automatically add all movies in your library to your iPad each time you sync. Click the "Sync" button in the bottom-right corner of the iTunes window to update and sync movies from computer to your iPad through iTunes.
Air Playit is a handy free music videos streaming app focusing on streaming various videos, movies and music files to iPhone iPad, iPod as well as Android devices via WiFi and 3G/4G network.
How to Free Stream videos and movies from PC/Mac to iPad with Air Playit?
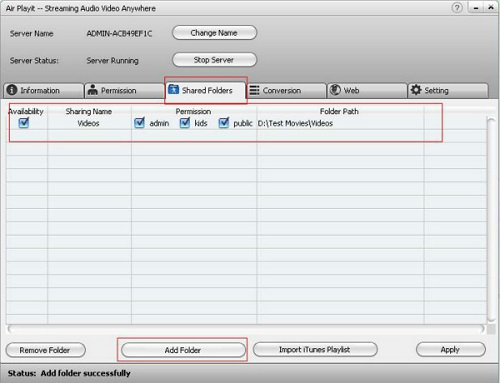
Step 1. Open Air Playit server and click Shared Folders tag. Click "Add Folder" button for importing movie or video folders on your PC/Mac. Also, you can set permissions to allow others to access the shared folder.
Step 2. Open Air Playit app on iPad to connect server. Because of Bonjour service, the server on your PC/Mac will be automatically detected. If you want to connect server on other computer, please specify IP address.
Step 3. Select server and get shared folder. Open this folder and choose your favorite video and movie to play.
Benefit of streaming music and videos from computer to iPad is clear: convenient.
Many video players for the iPad support file transfer via iTunes. VLC, flex:player and PlayerXtreme HD (which we will learn more about later) are the best ways to do it. In the example, I'm using VLC because of it's ability to play a wide variety of formats and, of course, its stability.
Step 1: Connect your iPad to your computer and let iTunes come up.
Step 2: From the Menu Bar at the top on iTunes, click on Apps.
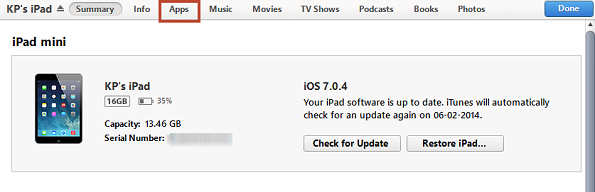
Step 3: Now scroll down to the File Sharing section.
Step 4: From the left pane select the app you want to send your videos to. In this example I went with VLC, but you can use other supported players as well.
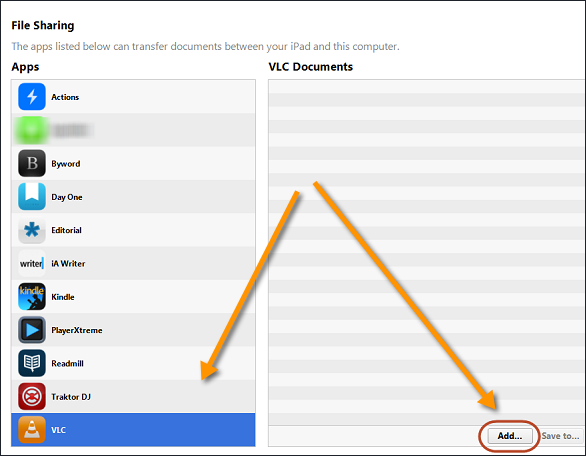
Step 5: From the right pane, click the Add button you find in the bottom-right corner. A window will popup. From here select the videos you want to sync to your iPad.
Step 6: Click open and your videos will be copied to the iPad storage in minutes.
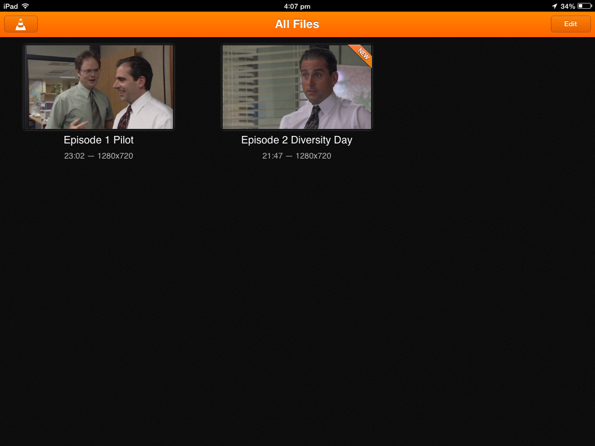
Now when you open up VLC, you will see your videos in the Library ready to be played.
If you don't like to connect your iPad to your PC every time you want to transfer a movie or a video, I have a solution for you. First, you'll need to download an app called PlayerXtreme HD (Free). For this to function properly, both your devices need to be on the same network.
Step 1: Once it's installed, open it up and go to the Wi-Fi tab.
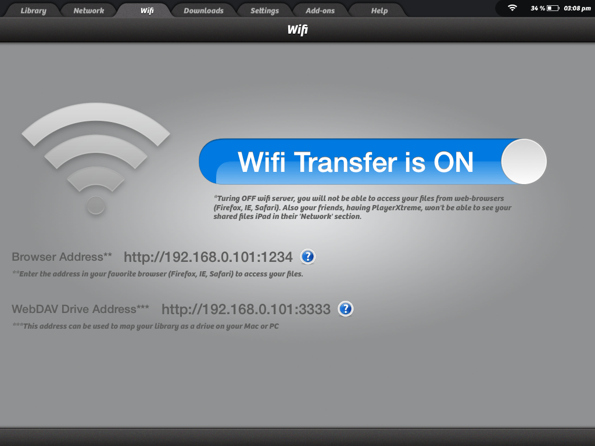
Step 2: Note down the Browser Address from the screen.
Step 3: Now go to the computer where your videos are stored and open up a modern web browser like Chrome. Enter the address exactly as it is and hit enter.

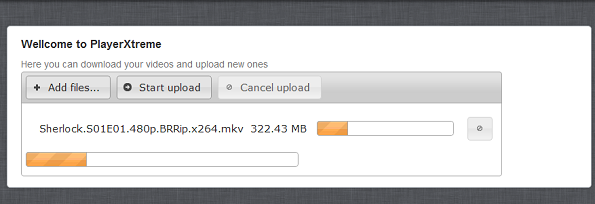
Step 4: On this screen, click the Add files button and choose the videos you want to transfer.
Step 5: Now click the Start Upload button and wait for it to complete the transfer.
Your synced videos will appear in the Library tab in PlayerXtreme.
Step 6: Stream Or Download Videos From Shared Network
PlayerXtreme HD has a really handy feature. If you have HomeGroup sharing turned on and you share videos with Guest, PlayerXtreme will pick that up automatically and let you stream or download those videos. This feature can be activated by purchasing a $0.99 add-on from the add-ons tab called "Access Network drives and Folders".
The linked post above talks about the steps to enable and use HomeGroup, but here's a quick run down.
1. On your Windows PC, Create a HomeGroup from the HomeGroup Control Panel.
2. Now go to the file or folder you want to share, right-click, and from the Share with option, select Specific People.
3. From this dialogue box, add a new user called Guest from the text input field. Assign permissions for Read/Write, and that's it.
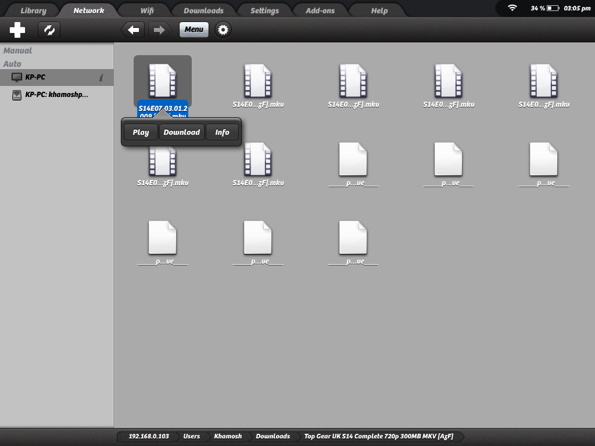
After you've shared your files with Guest, meaning any shared device on your network can request access, fire up PlayerXtreme.
Inside the app, select Network tab from the top menu bar. Wait for some time while it scans your network. After which you should see the files you've shared from your PC. When you see something you like, tap the video and select Play to stream the video or Download to save it on your iPad.
Perhaps the easiest way to put movies onto your iPad without using iTunes is by using Dropbox, Google Drive or other cloud storage service. However, it's also a method that takes the most time.
This method requires you to have the app of the cloud storage service on your iPad, so if you use Dropbox, be sure to download and install the Dropbox app from the iTunes App Store. Furthermore, you can download and install the desktop app on your computer. Otherwise, you'll be using the web interface.
To use cloud storage to transfer a movie to your iPad, simply just copy and paste the movie file into your Dropbox folder on your computer. Depending on the file size and the speed of your internet connection, the movie could take a few minutes to a few hours to sync to Dropbox.
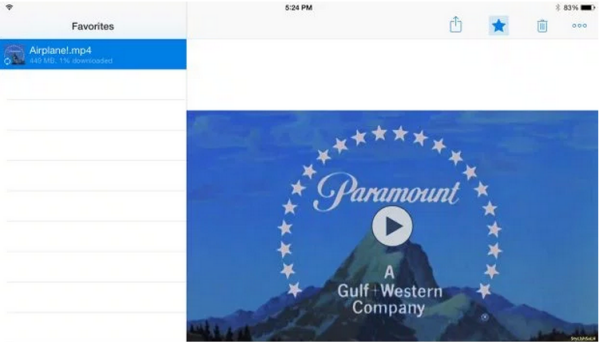
Once it's synced, you'll then be able to access it in the Dropbox app on your iPad. From there, you either watch it directly in the Dropbox app or watch it in the Videos app on your iPad.
To watch the movie directly in the Dropbox app, you can begin playing it in the app if you have an internet connection. Otherwise, you'll need to tap on the star icon in the upper-right corner and save the movie to the Dropbox app in order to watch it offline.
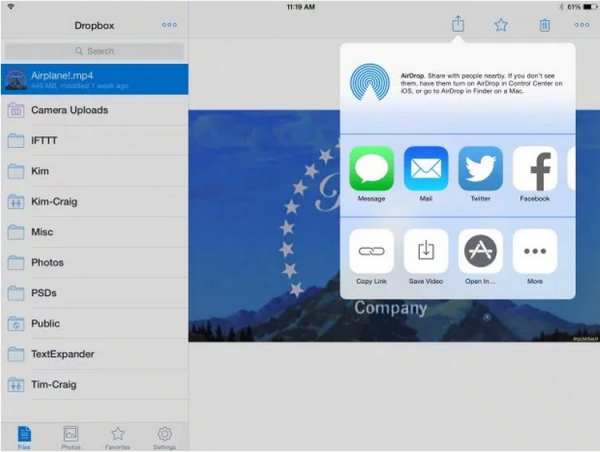
If you want to export the movie to your iPad and watch it in the Videos app on your iPad, you'll need to tap on the Share icon in the upper-right corner and then tap on Save Video.
Here would like to recommend you Wondershare TunesGo or Wondershare TunesGo (Mac) which can help you effortlessly transfer videos from computer to iPads without iTunes. And also convert unsupported video to iPad before transferring.
1. Connect iPad
Open Tunesgo and connect your iPad to PC with a USB cable. TThis program will detect your iPad immediately after it's connected. Make sure you have installed iTunes on your computer. TunesGo only works while iTunes is installed.
2. Move video from computer to iPad
Once connected, go to "Media" and click "Movies", you will see all your movies already stored on your iPad. Click "Add" button, select the movies you want to transfer from computer and finally confirm it by clicking "Open". Within a minute, you'll see your wanted videos are on iPad. Then disconnect your iPad from computer.
In addition to iPad, it supports iPhone 6s(Plus), iPhone 6(Plus), iPhone 5s, iPhone 5c, iPhone 4S, iPod touch 4 and more as well.
Part II: How to Transfer Unsupported Videos to iPad?
Please note that the iPad Tablet is not compatible with all formats of media files. If a file is not compatible with iPad, then it won't play after being transferred.
To get videos compatible with iPad (Pro, Air/Air 2, Mini 4/3/2/1, etc.), you need to:
1. Check out our iPad Mini/Air/Pro supported video formats.
2. Get a video converter for iPad.
3. Convert video to iPad video formats supported MP4, MOV, M4V and that's all.
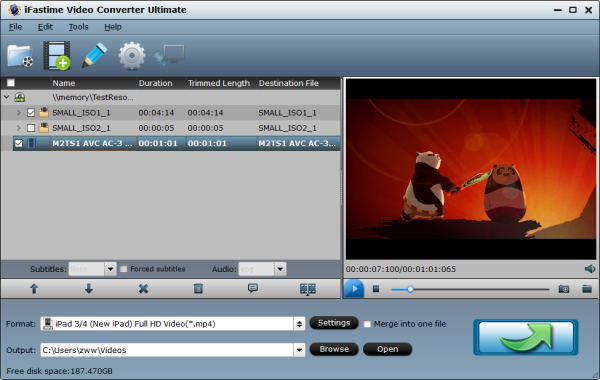
Here iFastime Video Converter Ultimate is a swift, easy and adaptable digital video converter, Blu-ray/DVD Ripper for Win (Win 10 available). It allows you to convert any videos including MP4, MKV, AVI, Tivo, FLV, VOB, MPG, TS, MTS, M2TS, etc. or Blu-rays/DVDs to iPad supported video/audio format, parameter settings with lightning-fast conversion speed. With the aid of this smashing iPad video converter, you can play all SD/HD/4K videos on iPad (Pro, Air/Air 2, Mini 4/3/2/1, etc.) with less occupation regardless of video formats or codec.
Use the program to instantly broaden your entertainment options with your computer since it let's you target exactly which device you want your videos to play on, with default settings for Apple's iPhone, iPad and iPod devices as well as Android, Sony PSP, Windows Media Player and Movie Maker, WDTV, Google Nexus series, Surface, Asus, Acer, and other popular devices, etc.
Free Download iFastime Video Converter Ultimate:
How to Convert video for Smooth Playback on iPad (Pro/Mini 4/Air 2)
Step 1. Add your video(s) to list. It supports downloaded/recorded video, or Blu-ray/ DVD. It can easily remove copy protection from Blu-ray/DVD.
Step 2. Click "Format" bar to choose a profile which you want to transfer it to iPad.
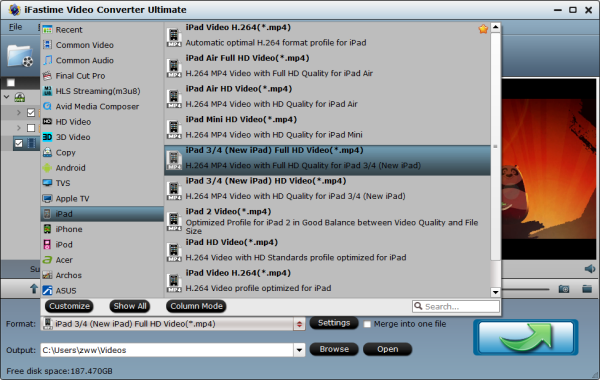
Step 3. Set the output patch.
Step 4. Click "Start conversion" to start this conversion process. After that, click "Open" to get output video for adding/transferring to iPad successfully. So easy! Isn't it?
Related Articles:
- Transfer Local Video Files to Android Devices
- Transfer music and video to BlackBerry Priv
- How to Transfer Data from iPhone 5 to iPhone 6S?
- How to Stream Any Movie Format to Xbox 360/Xbox One
- Transfer files from computer to Samsung Galaxy devices
Have more questions about how to add or put Movies to iPad from PC/Mac Easily, please feel free to contact us>>
One thought on “How to Add or Put Movies to iPad from PC/Mac Easily”
Leave a Reply
You must be logged in to post a comment.
Categories
Ultimate media solution to convert all SD, HD, 2K, 4K videos to play, edit, share on Windows 10.
Price: $45.95
Nice, many thanks for this solution.