Get Thanksgiving movies into NAS drive for Streaming
Nov 25, 2015 06:52 pm / Posted by Charles Brown
It's Thanksgiving again. For some moviegoers, Thanksgiving means more than turkey and plethoric tryptophan: it means a full multiplex packed with broad-appeal crowd-pleasing movies beining unveiled. If you want to backup these Thanksgiving movies on NAS drive for watching everywhere with family or friends, this guide would be helpful.
How to Make Your Thanksgiving movies Most Suitable for Playing and streaming from NAS drive
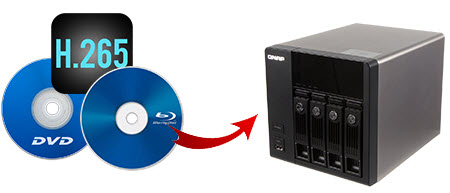
Generally, you may encounter great difficulty in playing Thanksgiving media files (Blu-ray, DVD, H.265, etc.) from a home NAS server. In fact, it is necessarey to change your Thanksgiving movies to a playable format for enjoying on Apple computer, watching on iPhone/iPad/Android, uploading to YouTube/blog, opening in VLC/QuickTime player, editing on iMovie, etc. before managing and storing them onto NAS drive.
In such cases, iFastime Video Converter Ultimate is a great helper for you. For one thing, it has abundant profiles such that users do not have to make personal settings while getting the best output videos made for main-stream mobile devices, media players, game consoles; for another, this NAS video converter also allows users to select and adjust aspect ratio, change bitrate and other video/audio parameters to get the most ideal output files for any portable device. All your media files including 2D/3D Blu-ray, DVD, ISO, H.265, 4K, AVI, MKV, AVCHD (.mts, .m2ts), MPEG (.mpg, .mpeg), MOV, WMV, FLV, VOB, Tivo videos can be converted for playing from NAS in a simple manner. For mac users, please turn to Mac version. Now just download the program to learn how to convert Thanksgiving movies to correct format to store on NAS for streaming.
Free Download or Purchase iFastime Video Converter Ultimate:
Converting Thanksgiving movies to NAS Drive streaming
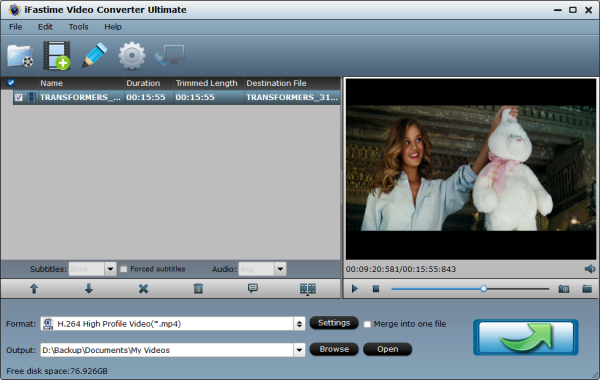
1. Add Thanksgiving movies
Run the Thanksgiving Video Coverter; click the "Add video" button to load video files or hit "Load file(s)" to import Blu-ray/DVD to the program from your computer. You can also directly drag the video files into the program.
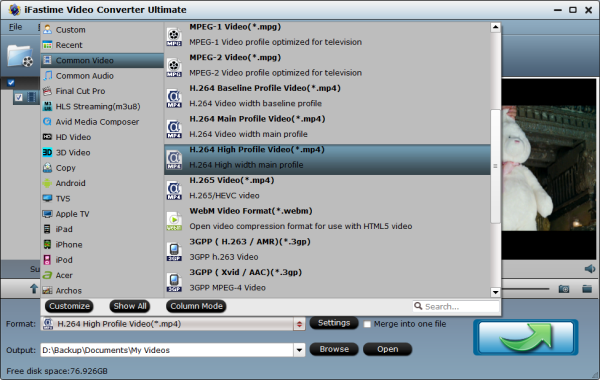
2. Select the output format
Hit the Format box and choose your desired format. To store Thanksgiving movies on NAS for widely using, you'd better encode your movies to .mp4, .mov, or .avi, etc compressed format. Here, MP4 is highly recommended for its easy availability, high compatibility, great compression rate and especially amazing video quality.
Tip: If you like, you can click "Settings" to change the video encoder, resolution, frame rate, etc. as you wish. Keep in mind the file size and video quality is based more on bitrate than resolution which means bitrate higher results in big file size, and lower visible quality loss, and vice versa.
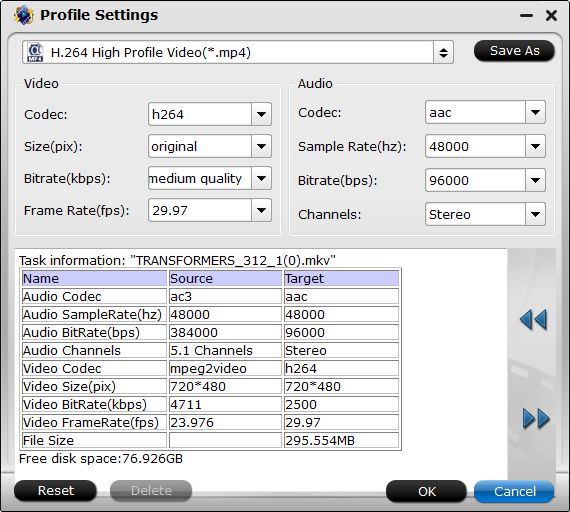
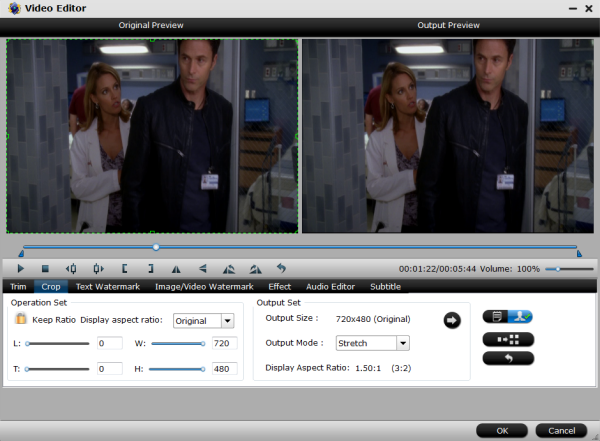
Meanwhile, this converter also comes with useful editing functions, like video joining, video trimming, splitting, cropping, add subtitles, etc.
3. Start to convert Thanksgiving movies to NAS drive
Simply click the "Start conversion" button to start encoding Thanksgiving movies to MP4 for NAS. Within several minutes, you can find the converted file on your computer by clicking the "Open" button. Afterwards, it’s free to stream Thanksgiving movie files from NAS onto Apple TV, PS3, HD TV or other media players. Make sure the wireless network connection is accessible first.
External Reading:
What can NAS can do for you:
A NAS is great for people with large media libraries: You can store all your files in one place and stream them to computers, speakers, or media centers throughout the house. You can also back up your computers to the NAS and avoid connecting an external drive to every computer.
How to setup your own Network Attached Storage (NAS server):
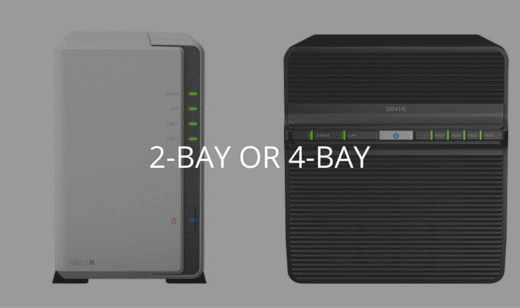
1. Get a network attached storage
There are several sharing NAS devices available in the market with different speeds and set of features. Just choosing one first.
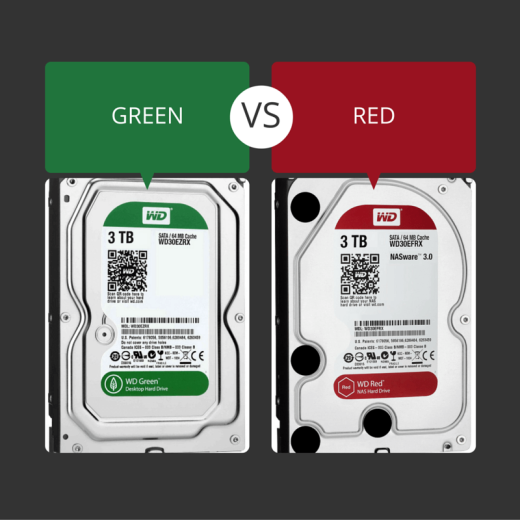
2. Install the hard drives
Remember that most of the time the NAS servers do not include hard drives, so you need to buy them separately. Now you are ready the start the server.
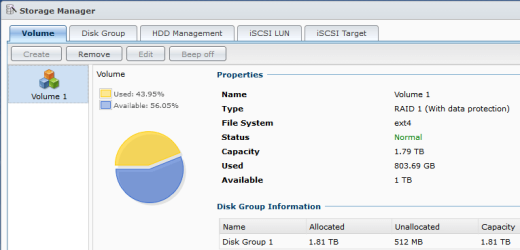
3. Manage storage spaces
Synology has made mapping a hard drive very easy on Windows machines with their Synology Assistant software. This is particularly useful for beginners who do not know how to map network drives in Windows. Storage Manager allows you to manage your hard disks and storage spaces, expand your storage capacity or create resilient data volumes.
4. Create media structure
In the Synology Disk Manager, shared folders are directories where you can store and manage media files and folders.

Here is an example folder structure for media collections:
Music: I'm using iTunes to organize my music collection and I wanted to make sure that it would update files automatically to the network drive. So I deleted the old iTunes music library and imported a new library from the network storage. Remember to change the default saving folder to NAS as well.
Pictures: Some people like to store photos based on event names. However, I favor a bit more simple structure, organized by year, month and genre. The month categorization is used for general and family photos while the genre categorization is used for highlighting the best photos in genres such as nature, landscape, close-ups and so on.
Videos: It is better to have as flat of a video folder structure as possible (of course depending on the size of the collection). I'm categorizing videos into four subcategories: Children's videos, home videos, movies and TV recordings.
Children's videos and TV recordings have subfolders for each TV show so that it is easy to store all the episodes of a TV show into one folder.
Home videos are categorized by year as I'm not shooting so many home videos that I'd need subfolders by month.
Movies are categorized into two subfolders: HD (High Definition = Blu-ray quality) and SD (Standard Definition = DVD quality).
5. Configure NAS with Kodi
Once you have copied all the files to the NAS drive, it is time to configure the server with the media center software. You can do the following steps in most popular media centers such as Kodi, Windows Media Center, Plex, Emby and Media Portal.

There are three main sharing protocols you can use to stream media files from the NAS: NFS (Network File System), SMB (Windows File Sharing, Server Message Block) or UPnP (Universal Plug and Play).
Many people are asking which one to choose and my recommendation is to use NFS as it is much faster especially when using lower performance front-end HTPC devices. If you are using a fast computer over Gigabit Ethernet home network, you will probably not notice any difference between SMB and NFS. For many people SMB is fast enough.
However, if you are using a slower HTPC such as Raspberry Pi or wireless network connection, I would strongly recommend using NFS sharing protocol.
First, you will need to enable NFS sharing protocol on your Synology NAS:
- Go to "Control Panel" > "Win/Mac/NFS" > "NFS Service" > "Enable NFS".
- Go to "Control Panel" > "Shared Folders" > Select the folder you want to modify permissions and Select "Privileges" > "NFS Privileges".
- Click "Create" and type * as "Hostname" and set Privilege "Read only".
I will use Kodi media center as an example of how to create a video folder share with the network drive:
- Select Video from the Kodi home menu
- In the files view, select "Add videos…"
- Select Browse
- Scroll to the bottom of the list and select "Add Network Location…"
- Choose the "Protocol" as "Network File System (NFS)"
- Browse for new share on your home network e.g, 192.168.1.39
- Select the "Shared folder" on your NAS e.g, Movies
- Enter a name for this media source, e.g, Movies
- Click OK
- In the "Set content" menu select what type of media this directory contains (e.g, Movies)
- Click OK
- Answer "Yes" to the Change content question.
Depending on the size of your media library, it will take a while to scanning for new content.
Video Tutorial - Get Thanksgiving movies into NAS drive for Streaming
Have more questions about how to get Thanksgiving movies into NAS drive for Streaming, please feel free to contact us>>
.Related Articles
2 thoughts on “Get Thanksgiving movies into NAS drive for Streaming”
Leave a Reply
You must be logged in to post a comment.
Ultimate media solution to convert all SD, HD, 2K, 4K videos to play, edit, share on Windows 10.
Price: $45.95
Heya i am for the primary time here. I found this board and I find It truly useful & it helped me out a lot. I’m hoping to provide something back and help others such as you helped me.|
This tool takes the hard work out of managing video content between PC and non-compatible NAS devices.