Convert AVI to Edit in Sony Vegas 13/12/11
Apr 06, 2016 06:07 pm / Posted by Charles Brown
Does Sony Vegas Support AVI Files?
As one of the most common formats, AVI files are what we have on hand mostly. AVI format is listed as one of the supported formats by Sony Vegas. It is a highly compatible format that you cannot afford to overlook when using this program. When your Sony Vegas 13/12/11 has problems and keeps on displaying error messages on the screen, you should not get too much worried in case. Here shows you two solution for "Sony Vegas Can't Import AVI" error on your computer screen".
Why We can't import some AVI file to Sony Vegas?
AVI is a multimedia container format just like MKV and MP4, that stores video data that may be encoded in a variety of video codecs including MPEG-1, MPEG-2, MPEG-4 (A) SP, H.264/MPEG-4 AVC, VC-1/WMV, RealVideo/Theora, Microsoft MPEG-4 V2, VP8, and audio codecs including MP3, WMA, RealAudio, AAC, AC-3, DTS, PCM, LPCM that are not compatible with Sony Vegas. Normally, Vegas has absolutely no problem with AVI files as long as there's an underlying codec installed. However, if there is no corresponding video or audio codec installed on your computer, you will fail to import or play AVI to Sony Vegas 13/12/11.
Solution 1 to solve Sony Vegas Won't Import AVI files:
------ Download and install the missing codecs on your computer
With the right codec, Sony Vegas 13/12/11 will not have any problems functioning with AVI file as you may wish. There are very many online sites from where you can download the codec. Here AVI Codec Pack Pro is suggested.
Download and install it, then open Sony Vegas to import AVI files. Make sure you close and reopen Sony Vegas if it already opens when you installing the codecs.
If installing AVI Codec Pack Pro can't solve your problem, you will need to download DivX H.264 Decoder and FFDShow MPEG-4 Video Decoder.
Solution 2 to solve Sony Vegas Won't Import AVI files:
------ Convert AVI files to Sony Vegas supported video format
To download a proper codec pack is somewhat annoying. Well, no need to worry now. Since we can directly import some other formats of videos (WMV and MPEG-2 are better choices) to it, the easiest way for us to deal with the problem is to convert AVI to WMV or MPEG-2, that is to convert unsupported AVI to Sony Vegas supported format.
Make Preparation: The top AVI to Sony Vegas Converter:
In order to save you time, we here directly shows you iFastime Video Converter Ultimate (Windows 10 supported) to solve your problem as quickly and easily as possible. The program is very easy to use and has all the important features that you may need. It can help in customizing the videos through using the basic tools for editing available while its speeds are very high with no quality loss at all. Key features:
- Blu-ray/DVD Toolkit; you can remove protection from Blu-ray/DVD and get them work with Sony Vegas after ripping/backing up them.
- Conversion speed; this tool enables you to convert video files six times faster than other converter tools. It also retains 100% quality of video, audio and images.
- Supported formats; iFastime Video Converter Ultimate supports formats such as MP4, FLV, WMV, DivX, AVCHD, VOB, 3GP among others.
- The tool can cut the video into multiple pieces, add sub-titles, effects as well as adjusting the video aspect ratio.
- Customize the output resolutions to any size like 1080p, 2K as users want from 4K
- It can also enable you to convert from 2D to 3D formats.
With this powerful Video Converter Ultimate, this article tells us how to make AVI to Sony Vegas conversion step by step.
Free Download iFastime Video Converter Ultimate:
How to convert AVI to WMV/MPEG-2 for Sony Vegas
1. Add AVI Files
Click "Add video" to add AVI files from the PC local to the program, or drage and drop the AVI videos to the converter. If you want to join the imported clips into one for easy editing, please tick the box "Merge into one file" on the main interface.
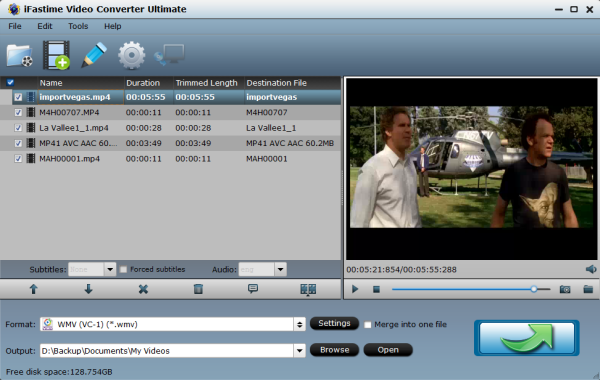
Besides, you can also click "Edit selected task" button to edit the AVI video with effect, watermark, trim, crop and subtitle as you like.
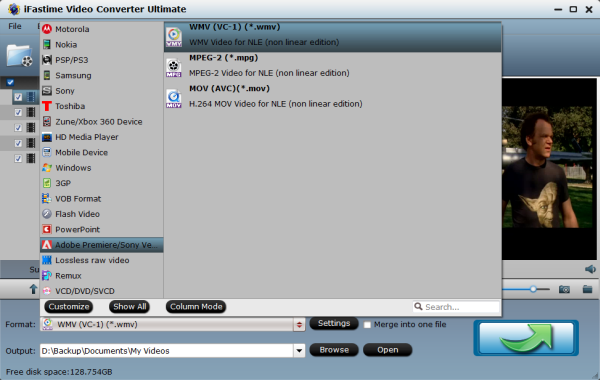
2. Choose the Output Format
After the aforementioned stuff, all you need to do now is to convert AVI to Sony Vegas. As for Sony Vegas, "WMV (VC-1) (*.wmv)" and "MPEG-2 (*.mpg)" from "Adobe Premiere/Sony Vegas" are better formats for editing. You can click to choose the profile which includes variuos formats, editors, TVs and mobile devices.
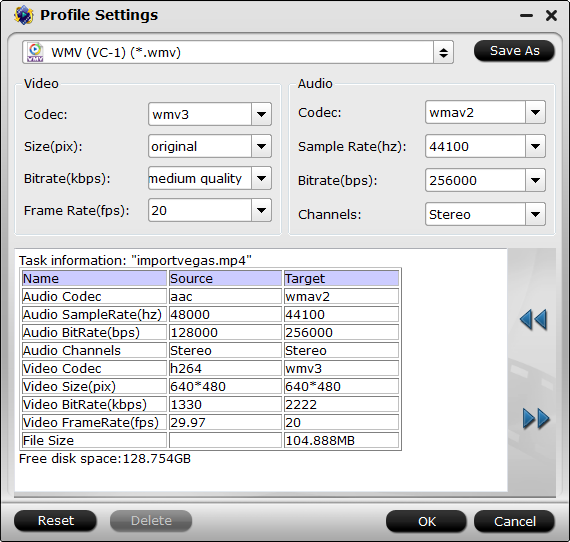
Before the final conversion, if you want to reset the settings, click "Settings" to get it done. You can set the data as below and click OK to finish setting:
3. Convert AVI to Sony Vegas
Now, please click "Start conversion" to start converting AVI to Sony Vegas. After conversion, your AVI files have been changed into .wmv or .mpg files, which can be easily imported into Sony Vegas and freely edited.
With iFastime Video Converter Ultimate, you will never be bothered by the process of converting AVI to Sony Vegas. It's that easy to solve "Sony Vegas won't import AVI" issue as well as "Sony Vegas AVI no video" issue as below.
- Imported AVI to Sony Vegas but it only played the audio? Download a codec pack but it's messing up Sony Vegas?
- Had a lot of funny AVI videos but can't edit them with Sony Vegas? How can we get AVI to work with Sony Vegas?
- Sony Vegas won't let me import an AVI video! When i drag my avi recordings it comes up with a message of "none of the files dropped on vegas pro could be opened". Why?
- How to solve the problem "Sony Vegas keeps rejecting my AVI footage"?
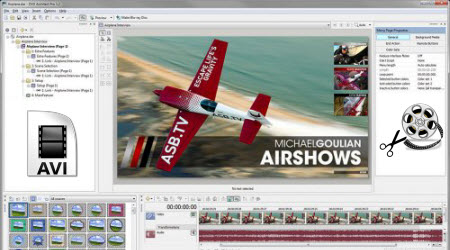
10 tips for lightning-fast editing with Vegas Pro
One of my main applications for Vegas Pro software is editing video reports from trade shows, where the priority is speed—turnaround is crucial. In the process, I've learned some useful efficiency tips. (Source from here)
- Prepare in advance. Create intros, outros, theme music, and templates before you go. A well-produced intro sets the tone for a video; don't spend hours doing that on site.
- Use Sony Cinescore software for "instant soundtracks." Nothing helps make a video more professional than a good soundtrack, and Cinescore software delivers. However, rather than using Cinescore "hints" to control how the soundtrack unfolds, I prefer to generate 15-20 minutes of music for a 5-10 minute video, then rearrange (cut and paste) different sections within Vegas Pro software.
- After transferring clips and stills to your hard drive, label them. "Clip1.avi" doesn't mean much, so take a few minutes to give all your data descriptive names. You'll save time overall.
- Don't bring an audio interface—USB mics are great. I often record narration first, then lay in video to match the audio. Not all USB mics work well for narration; I favor Audio-Technica's AT2020.
- Bounce while eating, render when showering. Do something else while your computer is tied up. For example, at hotels I start bouncing a one-hour tape over to the hard drive, then go to dinner—which typically takes just under an hour. Rendering while showering also saves time.
- Create a test video using all the gear you'll take on the road. This verifies that everything works, and when it's time to pack up, you won't forget anything—simply bring the gear you used to make the video.
- Install both 64- and 32-bit versions of Vegas with 64-bit computers. 64-bit computing is in its infancy; install Vegas 32-bit also in case you have problems.
- Take still shots to cover rough edit points. Rather than trying to fix tough edits—like where someone walked in front of the camera—take lots of still shots. Drop them in, then add some zoom and pan to give action.
- Use Sony Sound Forge software to clean up audio tracks. Sound Forge software can solve audio problems fast, thanks to tools like noise reduction. Also, if there are level variations with narration, you don't have to draw gain envelopes in Vegas Pro software—use the Sound Forge Wave Hammer processor to even out the dynamic range.
- Exploit the Vegas Pro "Paste Event Attributes" command. Often, several pieces of video or stills will need the same processing—for example, video clips that were shot in a room with low light, where all the clips require brightness and contrast adjustments. Get one clip right (before you do any pan, zoom, or other actions specific to that clip), copy it, then right-click on each of the other clips and select "Paste Event Attributes." This transfers all your settings to the clip.
Speed Up Rendering Times in Sony Vegas Pro and Movie Studio Platinum
Have more questions about how to import any AVI file to Sony Vegas for Editing, please feel free to contact us>>
Related Articles
Ultimate media solution to convert all SD, HD, 2K, 4K videos to play, edit, share on Windows 10.
Price: $45.95